Today, we’ll be sharing some tips for growing from seed.
If you’ve bought or have seeds for your garden, the next step is learning how to get those seeds to grow.

*Note: This is a collaborative series between my father, Boyd White, who has been gardening for nearly 40 years, and myself {Becky}. Scroll down to see all the posts in our gardening series.
**I am a participant in the Amazon Services LLC Associates Program, an affiliate advertising program designed to provide a means for me to earn fees by linking to Amazon.com and affiliated sites.
Starting Indoors or Outdoors?
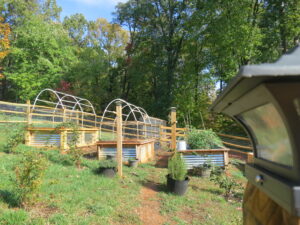
- Consider your Zone: The decision to grow from seed indoors instead of outdoors is primarily dictated by where you live. If you live in a warmer climate, like Zone 9 in Florida, more than likely, you can directly sow your seed right into the ground or your garden beds outdoors. If you live in a colder climate, you will need to start seeds indoors. This is particularly true of hot weather plants like tomatoes, peppers, melons. After the last frost, you can transplant them into the garden.
- Refer to your Seed Packet: All seeds which take ninety days to harvest should be started inside. The seed packet should tell you that kind of information.
- Consider the Plant: Some plants do well with growing indoors and transplanting outside. According to almanac.com, plants like broccoli, tomatoes, and peppers do well starting indoors. They also say that root veggies like carrots and beets do better if you direct sow versus starting indoors first.
Tips for Growing from Seed: Three Methods
There are several ways to germinate your seeds. Today, we’re tackling three: 1- the paper towel method, 2- in a clear plastic sandwich bag, or 3- via a growing medium such as peat moss.
To help with the germination process, you may want to dampen the towel and/or the seeds with a hydrogen peroxide water mix. The mix would be one part hydrogen peroxide to twelve parts distilled or filtered water.
Using hydrogen peroxide may also help to prevent mold. Some gardeners say to use a weak solution of chamomile tea and put you seeds in that solution from 8-12 hours.
Seeds like corn, beans, peas, squash and nasturtiums seem to benefit the most from this “pretreatment.”
1. The Paper Towel Method
The paper towel method is probably the easiest for the first-time or beginning gardener.
To do this, you’ll need paper towels as well as two plates.
Slightly dampen or spray a paper towel placing it on your paper plate. Then place the seeds onto the damp paper towel. Don’t crowd the seeds together — spread them around the paper towel and leave plenty of room between them.
Then place another moist (not soaking or dripping wet) paper towel on top of the seeds. Gently press the paper towel down on top of the seeds to ensure they are completely enveloped between the paper towels.
Finally, place the second plate upside down over the seeds in a clamshell-like fashion. This will provide the dark environment your seeds need to germinate.
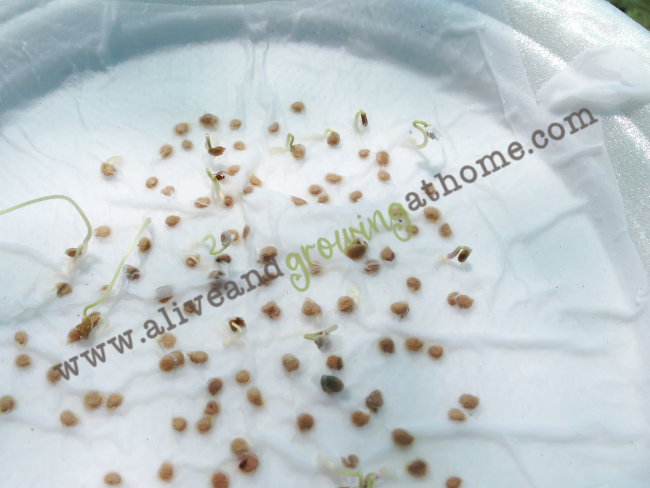
Every day or so, check on the seeds to monitor their progress and ensure they don’t run out of moisture. If the paper towels start to dry out, dampen them again with a spray bottle.
Germination time can vary, but generally the seeds should open up within a few days of starting the germination process. Once the initial roots emerged and grown to a few millimeters in length, you’ll be ready to transfer your seedlings into your grow medium {see #3 below}.
2. The Sandwich Bag Method
Another method is by using a clear plastic sandwich bag.
Using this method you’re making your own miniature green-house. This method provides two crucial items for seed germination to occur: moisture and heat. By starting seeds in a bag, you can easily provide both, plus light if the variety of seed is one that is photosensitive as some lettuces are.
Before you put anything in your bag, mark the bag with a permanent marker as to the item and the date. {You’ll thank me later…}
Next, moisten your absorbent material such as a paper towel. If you the material is too wet, gently squeeze out the excess water. Lay the material out flat and place seeds on one side of the material and then fold over. Put the seeds in the plastic bag and seal it as best as you can.
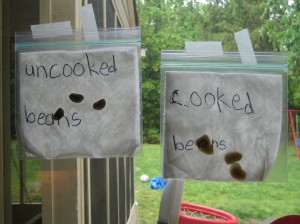
{This makes me think of our bean experiment when my kids were little.}
If the seeds need light, place them by a bright window, unless you have grow lights available to you. If no light is required, put them some place where it is warm {but not hot}.
You can use a seed germination mat if you wish since they produce a fairly low temperature and shouldn’t melt the bags. It may be best to put a rag or towel over the mat first before placing the bags on top just to be sure.
Germination times will vary when using the baggie seed starting method, but will generally be faster than soil planting. Check on your seeds every four to seven days, open the bag to release excess condensation which can contribute to damping off.
Once the seeds have sprouted, use toothpicks to carefully transplant seedlings to the soil to grow further before it’s time to direct plant outside.
3. In a Growing Medium
This leads us to the last method – planting your seeds into a “grow medium.”
You’ll want a medium that is lightweight so the seedling can get its roots established without too much effort. The most common media for seed germination includes peat moss*, coco coir, or a combination seed starter mix.
*Due to the acidity of peat moss, it is best to add in a little pulverized lime.
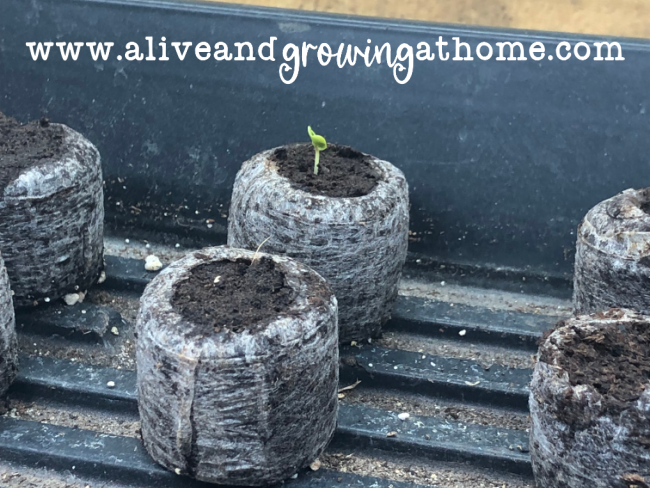
I, Becky, prefer the Jiffy peat moss pellets, as seen in the image above. Just add water and you’re good to go. I’ve had great success with these for the last two years.
Do not use garden soil, potting soil, or any medium with fertilizer since the seeds will generally not survive. These mediums provide either too many nutrients and/or harmful microbes, either which will kill of your seeds should they germinate.
Again, you can use a seed germination mat. Just be sure to put a towel or rag down between the two. I’ve had some plastic trays begin to stick to the mats because of the heat.
The basic idea here is the same as the paper towel method {#1 above} – You’ll dampen the media, insert the seeds then keep them in a warm, humid environment until the initial root emerges.
Growing from Seed: Four More Quick Tips
1. Watch the Moisture Levels – Once your seeds have germinated, you will want to watch the water levels making sure that they don’t dry out as this will kill your seedlings.
At the same time you don’t want to give your seedlings so much water that they are swimming in water, becoming very soggy. The trick is to have you seedlings/plants have about the same amount of water a sponge would hold, without it dripping out profusely.

2. Watch for True Leaves – Once the true leaves begin to grow in on your seedlings, it’s important they get more nutrients! Seed starter won’t be enough to keep them going. Either transplant them into potting soil or transplant them directly into the ground and fertilize.
3. Acclimate of Your Seedlings – Even if you’re past the last frost date in your area, if you’ve grown your seeds indoors, we highly recommend getting them acclimated to the conditions outside before you just plop them in the ground. This helps to prevent shock.
You can do this by taking your seedlings outside on a warmer day and letting them sit for about 2 hours. The next day, take them outside for about 3-4 hours. On the third day, try for 4-6 hours. By the sixth or seventh day, your seedlings will hopefully be acclimated and ready to plant without experiencing shock.
4. Watering your Seedlings – Once your seedlings have been transplanted in your garden you will need to water them well where both the soil and the roots are drenched thoroughly. Then at least every other day they should be water well again for about a week or two to get them established.
Happy Gardening!
~Becky
More Posts in our Gardening Series…
-
- Introduction


Leave a Reply